Thursday, 4 June 2015

Get local system users and details with PowerShell

Get local system users and details with PowerShell


Ok, now we are dealing with only the local users on the system.

a simpler way to get the details are by using the below one-liner.

Get-WmiObject -Class Win32_UserAccount -filter "LocalAccount = '$True'" -ComputerName localhost -Namespace "root\cimv2"

you could pipe the above one-liner to '| select *' at the end to get more details on the each account available.

Get-WmiObject -Class Win32_UserAccount -filter "LocalAccount = '$True'" -ComputerName localhost -Namespace "root\cimv2"  | select *


Give a try to execute this to grab remote machine users and see how it worked or didn't work...


As always.

-Happy Scripting.

How can the $? be used in powershell.

How can the $? be used in powershell.


It reports whether or not the last-run command considered itself to have completed successfully. You get no details on what happened with it. It returns a boolean value.

The $? variable is a Boolean value that is automatically set after each PowerShell statement or pipeline finishes execution.  It should be set to True if the previous command was successful, and False if there was an error.  If the previous command was a call to a native exe, $? will be set to True if the $LASTEXITCODE variable equals zero, and False otherwise.  When the previous command was a PowerShell statement, $? will be set to False if any errors occurred (even if ErrorAction was set to SilentlyContinue or Ignore.)

Just be aware that the value of this variable is reset after every statement.  You must check its value immediately after the command you’re interested in, or it will be overwritten (probably to True).


The $? variable doesn’t give you any details about what error occurred; it’s simply a flag that something went wrong.  In the case of calling executable programs, you need to be sure that they return an exit code of 0 to indicate success and non-zero to indicate an error before you can rely on the contents of $?.


Example:

Add-Computer -DomainName $Domain  -Credential $cred -OUPath $OUPath
if ($? -ne 'True') {exit 100} #if the above line of command failed for some reason it returns 'False' or if it successfully completed it returns 'True'.

Simpler example.


Happy scripting..

Tuesday, 5 May 2015

Powershell IF

Lets briefly describle the usage of Powershell IF statement.

If you had any prior experience with programming languages like C, Java etc, it follows the same flow in PowerShell too.

We would start with some handy compare operators that we could use along with the IF condition.

general syntax of IF usage.

If ($this -eq $that) {
  # commands
} elseif ($those -ne $them) {
  # commands
} elseif ($we -gt $they) {
  # commands
} else {
  # commands
}

A sample to try using the IF statement.

Example 1

$Status=(Get-service -name bits).status
If ($Status -eq "Running")
{
    Write-Output "Service is being stopped"
    Stop-Service -name bits
}
Else
{
    Write-Output "Service is already stopped"
}

Example 2 : Simple IF

 if ($a -gt 5)
 {
         Write-Host "The value $a is greater than 5."
 }

Example 3 : Simple IF & ELSE

 if ($a -gt 5)
        {
            Write-Host "The value $a is greater than 5."
        }
        else
        {
            Write-Host "The value $a is less than or equal to 5"
        }


Example 4 : Simple IF, ELSE & ELSEIF

        if ($a -gt 5)
        {
            Write-Host "The value $a is greater than 5."
        }
        elseif ($a -eq 5)
        {
            Write-Host "The value $a is equal to 5."
        }
        else
        {
            Write-Host "The value $a is less than 5"
        }


We could try the below comparison operators while using IF condition.

Comparison Operators

The following operators are all Case-Insensitive by default:

 -eq                 Equal
 -ne                 Not equal
 -ge                Greater than or equal
 -gt                 Greater than
 -lt                  Less than
 -le                 Less than or equal
 -like             Wildcard comparison
 -notlike        Wildcard comparison
 -match          Regular expression comparison
 -notmatch     Regular expression comparison
 -replace        Replace operator
 -contains      Containment operator
 -notcontains Containment operator


-Happy Scripting...

Wednesday, 18 March 2015

PowerShell change command prompt.

PowerShell change command prompt.


Yes, i am talking about the "PS c:\windows\>" looking thingie in the PowerShell console.
May be to hide the path, or if the prompt length has become too lengthy or from influence of a recent hollywood flick where the 'hacker' had his name instead of prompt, we would like to change it..;)

Here is how it could be done.....

PS C:\> # standard prompt which shows console is ready for input..

Windows Powershell, Changing the command prompt to Name.
Try 1:
        PS C:\> function prompt {"Hello > "}
        Hello >  # This becomes the prompt.


Windows Powershell, Changing the command prompt to Null.   
Try 2:
        PS C:\> function prompt {$null}
        PS> # this becomes the prompt you won't see the current working directory anymore.


Windows Powershell, Changing the command prompt to Hostname.   
Try 3:

        function prompt {"PS [$env:COMPUTERNAME]> "}
        # shows the hostname of the system


Windows Powershell, Changing the command prompt to date and Time.   
Try 4:
        function prompt {"$(get-date)> "}
        # shows date and time at prompt


Windows Powershell, Changing the command prompt color and attributes.   
Try 5:

        function Prompt
        {
            $promptString = "PS " + $(Get-Location) + ">"
            Write-Host $promptString -NoNewline -ForegroundColor Yellow
            return " "
        }
        # you could add any color for the prompt to reflect.
        # this could be customizable $promptString with anything we like.


Try 6:

function prompt
    {
        # to reset counter select and execute this > $global:LINE = 0
        $global:LINE=$global:LINE + 1
        $global:Loc = (get-location)
        'PS ' + $($loc) + ' ' + '(' + $($global:LINE) + ')' + $(if ($nestedpromptlevel -ge 1) { '>>' }) + ' > '

   }


 You could reset the line numbers with reseting the $global:LINE variable to 0 (Zero).
      
Happy Scripting..
        

Replace file content using PowerShell : Single and Multiple files.

Replace file content using PowerShell : Single and Multiple files.

Want to replace certain string using powershell?
Can be a single file or multiple files on you system..

Powershell offers a very simple way to achieve this and would considerably save your time for better things...

I would start of with editing single file first followed my multiple files..so open PowerShell console as Administrator and type along...

  • Editing single file:

Open Notepad and fill it with some random text.. or just copy paste this below text..

Server
Powershell
windows
Hosts
Active Directory
Exchange
Automation
Scripts
DSC
Hosting
Deployment
Administrator

save this as test.txt on your desktop, just ensure you are saving it correctly and not as test.txt.txt which may be appended while saving if not checked.

run the following cmdlet to verify.

change working directory to Desktop or where the test.txt was saved.

Get-Content .\test.txt


now we replace the "hosts" to "virtualhosts" by the below cmdlet.

(Get-Content -Path .\test.txt).Replace("Hosts","VirtualHosts") | Set-Content -Path .\test.txt


and check the content of the file now with the below cmdlet.

Get-Content .\test.txt


  • Editing Multiple files:

Now on the desktop., copy/ paste the test.txt file multiple times, may be 5 times.
So, we have five files .txt files which have data in it and we have to replace a specific string in all the five files at the same time.


All we need to do is improvise the above cmdlets into a script.

First we need a cmdlet to list all the txt files in desktop folder.

get-item c:\users\User1\Desktop\*.txt # this would output all the txt files and this has to be stored in a variable for script usage.

$InputFiles = get-item c:\users\User1\Desktop\*.txt # this would store all the file names with .txt extension.

Now we need a for loop, that would enable us to work with each file in the $InputFiles

$InputFiles = Get-Item "C:\Users\User1\Desktop\*.txt" # gathers the files ending with .txt
$OldString  = 'Powershell'   # string to be replaced with.
$NewString  = 'PowerShellisCool'    # new string
$InputFiles | ForEach {
    (Get-Content -Path $_.FullName).Replace($OldString,$NewString) | Set-Content -Path $_.FullName
}  # looping each file with its Fullname until all .txt files are covered and replaced with the new string.


Copy the above code to ps.ps1 and run it in powershell as administrator.


Listing of files in Desktop and showing the content in test.txt


 Ran the script ps.ps1 and checking the content in test.txt and other files.


Happy Scripting....

Tuesday, 17 March 2015

Download files online using PowerShell.

Download files online using PowerShell,


Downloading files from internet may be like pdf's, exe's, doc's, excel etc from a script can be achieved with the below simple command.

(New-Object System.Net.WebClient).DownloadFile( 'http://websitewhereyouwanttodownload.com\filename.ext ', 'c:\temp\xx.xxx')

NOTE; ensure you give the name of the file completely with extension where you want to download locally using this command.

Example;

I would like to download the VLC player from the URL http://videolan.org/

I would use the below PowerShell cmdlet to get it downloaded locally.

(New-Object System.Net.WebClient).DownloadFile( 'http://get.videolan.org/vlc/2.2.0/win32/vlc-2.2.0-win32.exe', 'c:\temp\vlc-2.2.0-win32.exe')

This would download the setup file to your temp folder.


-have fun scripting.

Tuesday, 3 March 2015

Use Powershell to send mail.

Use Powershell to send mail.

You need not bang your head with vbs scripts nor the executable/programs that send mail and cause worry to the security guys in your domain.


PowerShell has the most easiest way to send mail from console and not to mention we should be aware which one is the outgoing smtp server.

Send-MailMessage -To username@somedomain.com -Body 'Mail Body' -Subject 'Sending mail from PowerShell' -from'someuser@somedomain.com' -SmtpServer 'smtp.yoursmtpserver.com' -Attachment 'path of the attachment'


Isn't it easy? than downloading scripts that we didn't author and executing them on internal servers. :)

Give it a try...

Friday, 20 February 2015

Display first n lines, lines in middle or last n lines of a file with powershell.

Display first n lines, lines in middle or last n lines of a file with powershell.

Sometimes we need some specific content for a file, may be a version number , config details that lies in a specific file or config file.

We will be using the PowerShell cmdlets to achieve this.

Create a file with 10 lines with 1..10 and name it as file.txt


Now we use the cmdlet Get-content and get the required output using select.

Getting first 5 lines


Getting last 5 lines


Skipping first 3 lines and displaying rest..

Display some line in the middle say line 5,


This could be a useful approach to get the data fast across infrastructure with the help of PS remoting.

Tuesday, 17 February 2015

PowerShell to Remove Characters in a String

How to remove characters in a string using powershell

Lets start of with examples, and we have to use the –Replace operator, create a regular expression pattern that includes what you want to remove and then write the results back to the variable.

Note: here we are over writing the variable with the replaced characters.

$string = '{Abcde123**$45}'

$string =  $string -replace '[{}]','' # this will remove the {}

$string = $string -replace '12','' # this will remove 12

$string = $string -replace '12','{}' # this will replace 12 with {}

$string = $string -replace '\$','' # this would remove the $ sign Note: the \ before the $ after replace command.

Lets try one by one in PowerShell.


Get AD User expiration date from PowerShell


 Get AD User expiration date from PowerShell


To get the user expiration date on Active Directory from Powershell with proper formatting.

Try the below cmdlet.

Get-ADUser -Identity xxxxxx –Properties "DisplayName", "msDS-UserPasswordExpiryTimeComputed" | Select-Object -Property "Displayname",@{Name="ExpiryDate";Expression={[datetime]::FromFileTime($_."msDS-UserPasswordExpiryTimeComputed")}}


How to execute powershell Script from CMD

How to execute powershell Script from CMD

To execute PowerShell scripts in windows CMD prompt we have to use the argument -File.

Example
Open Notepad and copy/paste the below code and save it as print.ps1 extension ( be very careful and try not saving it as .ps1.txt )

Write-output "hello world!"

Then open the windows command prompt and assume that the script has been saved in temp folder, give the below line for the code to execute.


powershell -File "c:\temp\print.ps1"

Now, you could try more complicated stuff in your PowerShell Script.

Make AD User password Expire using Powershell.

Make AD User password Expire using Powershell.


If you want to make a user to change password the next time, use the below cmdlet.


#make user password expire
Get-ADUser -Identity (username) | Set-ADUser -ChangePasswordAtLogon:$true 

Tuesday, 20 January 2015

PowerShell Variables

Dealing with Variables in PowerShell.


Variables play a important role in any programming language and PowerShell is no exception for it.
Understanding Variables and playing with them is the key to essentially make your code more effective and helps us to present the code in more human readable format.

Here we would start with the basics of variable usage and declaration, calling and assigning stuff to them.

NOTE: I would keep this current line as note on all my other posts, which I would strongly recommend.Fire PowerShell Console and start typing along with me.

#Variables to store your stuff
#Assigning a variable


$FirstVar=33
${First Var}="PowerShell"

#To Get Output a variable from PS.

$MyVar
${My Var}
Write-Output $MyVar

#Strongly declare a  type of variable it would be.

#Here we tell the type of data we store in the respective variable.

[String]$MyName="VenuGopal"
 [int]$Number="123"

#Accepts only integer values below and we tried to add string and it would throw us error.
 [int]$Oops="Venu"


#Accepting value from console, storing and output the variable.
[string]$ComputerName=Read-host "Enter Computer Name"
Write-Output $ComputerName

#Assigning computer name to variable and calling that variable from a Commandlet.
$computerName="localhost"
Get-service -name bits -ComputerName "$ComputerName" |
    Select MachineName, Name, Status


Dealing with Quotes 

$ps="PowerShell"

# Mostly we use double quotes, it is used to display test along with variables that would be resolved later as per ther script together

"This is a variable $ps, and $ps is Fun!!"


#Single Quotes produce output as it is, the function, special stuff are simply ignored!

'This is a variable $ps, and $ps is Fun!!'

# the ` (the key on the tilt key above the tab would allow to ignore the next characters functionality if it had any.
#Typically the "/" "\" or some need where we have to nullify the force of some special character.. Soon you will get into this as we progress deeper :)


"This is a variable `$ps, and $ps is Fun!!"


#Output for the above three lines.

This is a variable PowerShell, and PowerShell is Fun!!
This is a variable $ps, and $ps is Fun!!
This is a variable $ps, and PowerShell is Fun!!

As said, we would gradually add more complex stuff as we progress.

Saturday, 17 January 2015

6 Powershell Cmdlets to start with.

6 Powershell Commands to start with.


      Powershell is the new management tool of the Microsoft, they have been promoting PS in every aspect. With Powershell there are a lot many managements tasks that could be achieved much quicker and ability to work in much detailed manner which the GUI fails to provide. As a systems administrator we would have to be familiar with some important yet basic commands to get started with. Included is some of the one liners that would certainly speed up our day to day activities and ease server management activities.

I would like to start off with the basic commands the moment we login to server to check something..

1.Check service status. (Get-Service)

As a recommendation from my end. Launch Powershell as Administrator and start typing the commands as we see in this page.

Lists all the services.( observer the output, you would see Status, Name and DisplayName)

PS C:\>get-service


Find service with Name ( observer the output, you would see Status, Name and DisplayName), Here we are querying with Name )

PS C:\>get-service -name bits


Find service with Name ( observer the output, you would see Status, Name and DisplayName), Here we are querying with DisplayName.Using wildcards "*" for search)


2.Check Process status. (Get-Process)

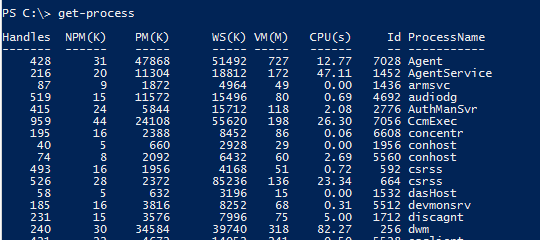
This command is used to check the running processes on the system.

Lists all the processes running on the system
PS C:\get-process 


Find process with Name ( observer the output, you would see Status, Name and DisplayName), Here we are querying with Name )

PS C:\> get-process -name notepad


Sort process with highest utilization

PS C:\>Get-Process | Sort-Object WS -Descending


3. Get-Command

         The Get-Command is one of the most useful cmdlets in the whole of PowerShell, as it will help you getting to know PowerShell by letting you search for certain cmdlets. Using Get-Command alone would provide all the commands, so we have to ensure we provide some parameters for the cmdlet to search.


To get the cmdlets

PS C:\> get-command -CommandType cmdlet


4. Get-Help

          Once you have found the cmdlet you are looking for using Get-Command, you are going to want to know the syntax and how you can use that specific cmdlet. This is where Get-Help will do the rest.
Get-Help give indepth details of each cmdlet, its usage and syntax. In addition it also provides examples when '-examples' switch is used with it.


If you need help with examples for any command we need to add the switch -examples to the command.


 5.Start and Stop Service

       To stop service, issue cmdlet stop-service followed by the service name. 


         To start service, issue cmdlet start-service followed by the service name.


Note: get-service, stop-service and start-service accepts wild cards for searching the name of the service. So Don't try stop-service -name *. It would case new issues then we already have :) .


6.Stop-Process.

        Sometimes, a process will freeze up. When this happens, you can use the Get-Process command to get the name or the process ID for the process that has stopped responding. You can then terminate the process by using the Stop-Process command. You can terminate a process based on its name or on its process ID. For example, you could terminate Notepad by using one of the following commands:

PS C:\>Stop-Process -Name notepad
PS C:\>Stop-Process -ID 6088


  • Also with the above examples, we could get familiar with the type of errors we get in PowerShell.
  • We opened a notepad in step 1, checked its details in step 2, killed it using -name parameter in step 3.
  • We opened a notepad in step 4, checked its details in step 5, killed it using -ID parameter in step 6.

7.Set-ExecutionPolicy

Microsoft has disabled scripting by default in an effort to prevent malicious code from executing in a PowerShell environment.
You can use the Set-ExecutionPolicy command to control the security surrounding PowerShell scripts.
The options available:

  • Restricted — Restricted is the default execution policy and locks PowerShell down so that commands can be entered only interactively. PowerShell scripts are not allowed to run.
  • All Signed — If the execution policy is set to All Signed then scripts will be allowed to run, but only if they are signed by a trusted publisher.
  • Remote Signed — If the execution policy is set to Remote Signed, any PowerShell scripts that have been locally created will be allowed to run. Scripts created remotely are allowed to run only if they are signed by a trusted publisher.
  • Unrestricted — As the name implies, Unrestricted removes all restrictions from the execution policy.

Adding more.......

Friday, 16 January 2015

PowerShell Help! It really helps! and with Examples!

PowerShell Help! It really helps! and with Examples!


The built in Help functionality in PowerShell is very systematically designed to act as your first point of contact if you need any help during your journey.

The Get-Help cmdlet displays information about Windows PowerShell concepts and commands, including cmdlets, functions, CIM commands, workflows, providers, aliases and scripts.

To get help for a Windows PowerShell command, type "Get-Help" followed by the command name, such as: Get-Help Get-Process. To get a list of all help topics on your system, type: Get-Help *. You can display the entire help topic or use the parameters of the Get-Help cmdlet to get selected parts of the topic, such as the syntax, parameters, or examples.

Get-Help gets the help content that it displays from help files on your computer. Without the help files, Get-Help displays only basic information about commands. Some Windows PowerShell modules come with help files. However, beginning in Windows PowerShell 3.0, the modules that come with Windows do not include help files. To download or update the help files for a module in Windows PowerShell 3.0, use the Update-Help cmdlet. 

Here I would give you some examples that demonstrate how useful the get-help command can be in PowerShell. Powershell commandlets are arranged in such a way that it almost allows you to "think what you want to do" and type "to get it". In simple terms its "think & type"


Some example based scenarios:


Get-Help with examples....


Get-help is very powerful cmdlet that can be your first step to try before you need any support from external sources.

Sunday, 4 January 2015

First Time PowerShell user?

First Time PowerShell user?

    I hear a lot and infact felt isolated when I've launched the PowerShell console for the first time and I think the unix console windows might have scared us to core to exhibit this common behaviour for windows guys or we are GUI stuck! :)
 
How to overcome the First Time issues?
    Step 1
         Just launch it believing its the extended version of Windows Command Prompt with a different color theme and I would like to highlight this "PowerShell supports all native windows commands".
When you launch for the first time.... try the dir, cd , date, time, ping etc it works!

   Step 2.
        Pin the PowerShell icon to the 'taskbar' on your system and start working with it by slowly replacing the 'cmd.exe' to PowerShell and start with the basic commands in PowerShell.

   Step 3.
        This would allow you to explore the new powerful console and what it could offer you on the long run and avoid cmd.exe as much as possible.

Bottom line for this simple strategy is to allow you to get more familiar with PowerShell, and yay! it looks cool.

Some DOS to PS basics for you to try ..

Change a Directory
  • DOS: cd
  • PowerShell: Set-Location
List Files in a Directory
  • DOS: dir
  • PowerShell: Get-ChildItem
Rename a File:
  • DOS: rename
  • PowerShell: Rename-Item 
Find Date:

  • DOS : date
  • PowerShell: Get-Date

We would certainly get into depth of each command, but I would recommend you to observer the PowerShell commandlets carefully.

PowerShell commandlets follow a Verb-Noun format. Example (get-date : get-verb, date-noun)

Give it a try: Guess what would be the PowerShell commandlet for checking all the services on a system?

If your answer is (Get-Service) .. way to go! if not, still long way to go :)

Procedure to Pin PowerShell to Taskbar and How to launch PowerShell console.

Its important to launch PowerShell with "Elevated Privileges" on a system to avoid any issues while executing the commandlets.

Right Click on Windows PowerShell and select "Pin to Taskbar"


Then Right Click on the PowerShell Icon and Select "Run as Administrator". Just remember this should be the standard procedure of launching PowerShell to avoid any errors related to permissions.


The PowerShell Console should always have "Administrator" on the Titlebar just to be sure you are Administrator and powershell is running with Administrator privileges.